Sunday 29 April 2012

Before and After...

It just occurred to me that I can finally do a whole before and after comparison.

Before:


After:


First Ride and a new home for Doris

I had a few hours to play this afternoon so set sorting out the fuelling issues.

First off I needed to sort a fuel filter. Regular readers will recall I was struggling to fit a filter into the short pipe run and had broken one in the process. I got hold of a smaller filter and also some newer and more flexible fuel hose. After a lot of thought about how to fit the filter into such a short pipe run, I ended up with a fairly simple solution. What I did was attach a 90degree bend to the fuel tap with a short length of hose, then ran a length of hose in a gentle loop round, under and behind the tap so that I could mount the filter further back and then it was a nice gentle bend to the carb. Hard to describe, but I'll load a photo to show it when I get one.

Now that I had a "clean" fuel supply, I could balance the carbs. Judging from the heat of each pipe, the right one was doing very little compared to the left and that was borne out by the readings on the gauges. A lot smoother now :)

I couldn't resist taking a quick run around the block to see how she ran, so I attached the old number plate and off we went:


She's not quite running right below about 4-500rpm, but then picks up her skirts and flies :) Not sure if I've got the air screws adjusted right, so I'll have a look at that next. Or maybe something to do with the auto advance? Any ideas welcome....

Final little bits - I added the shiny new mirrors. I also got the new horn working. Another lesson in not jumping to conclusions - when the new one arrived I hooked it up and it beeped once, then wouldn't work again. So I started thinking it was the handlebar controls that were faulty again. Then I thought to just try tweaking the adjuster on the new horn and bingo she beeps like a good 'un!

Now all I need to do to be ready for the MOT is to get the right hand indicators working reliably - that does need the switchgear looking at, but I think I can get to that OK. I'm aiming to book the MOT for next Saturday, which will give me the bank holiday weekend to get some shakedown running in before the "long" (1 hour!) journey to Northwich the following week.

So Doris's long occupation of the shed is at an end and she can now take up her rightful place in the garage beside the VFR, who shall henceforth be known as Dorothy (don't ask!).


Saturday 28 April 2012

Video evidence of the Grand Start-Up!

Video of the grand start up!


A bit smoky from the oil used to rebuild the top end but that soon settled down.

:)

Tuesday 24 April 2012

She lives!

2 evenings of great progress!

Last night I got all of the paintwork sorted - so the side panels had their chrome trims replaced and then went on, followed by the tank with badges, hinged cap, petrol tap etc. Looking gooooood!


I LOVE the metallic grey wheels and polished rims against that deep red paintwork - it looks exactly like I'd imagined it. I can't believe that I managed to resist seeing how it looked until tonight!

I struggled when trying to fit the fuel filter though. There is such a small space betweek the tap outlet and carb inlet. Eventually I got it fitted, but with some quite extreme bends in the pipe, and I had to twist the fuel tap out of it's normal position so that the pipe exited kind of sideways to give a little more room.

I also fitted the clutch cable. The pattern one is a couple of inches longer than the original and so doesn't sit quite as neatly, but it does work. So I thought I'd check the clutch is working - engaged 2nd gear, clutch in and try to spin back wheel - locked solid. Bum! Another problem to sort......

I ran out of time to go for the burn. In truth, I didn't like the thought of it not starting and having to end the night on a low!

So to tonight. I rolled her out of the shed for the first time in 2+ years; fuelled her up; switched fuel on; kicked over on the kick start a couple of times; thumbed the starter, and .....she fired up second press of the button! I couldn't believe it. Even settled into a reasonable, if a little lumpy, tickover.

Anyway, celebrations dying down; as she warmed up she was running progressively worse. Then I noticed the pool of petrol on the floor! The cheap plastic fuel filter had snapped at the pipe union - my fault I think, as I must have put it under too much stress. So the bike wasn't running rough - just running out of petrol! I cleaned up and took the filter out (gulp - risky) as I couldn't resist seeing what she was like when warmed up. The answer was "fine" - a bit lumpy - one cylinder is obviously working harder than the other - but that should be OK once I balance the carbs. The engine sounds like the mileage is correct at 10k.

About that sticky clutch now. With the engine warmed up, and on the centre stand (rear wheel off the ground), I stuck it in first - clutch in, wheel still spinning. Jammed on the rear brake - stall! Hmmm well at least I know the brake works, even if the clutch doesn't! I tried again, this time in second and success; the clutch freed up. So a quick ride round the garden was called for :)

The photos below were taken just after the first start, which is why it's all a bit smoky, while the oil from the rebuild is burnt off.


Couldn't be happier tonight!

For some reason I am feeling an urge to give her a name, now that she's pretty much complete. Strangely, Doris keeps coming to mind - don't ask me why because I don't know (other than it also begins with D.) I have never felt the need to name any of my other bikes ....... Must me the emotional attachment and investment that comes with the rebuild?


Sunday 22 April 2012

Light at the end of the tunnel - but boy am I a numpty!

Lots of progress this weekend, while Elaine was away on a girlie weekend in Scotland - I felt compelled to closet myself away in the shed so that the lads could concentrate on revision....


Most of the remaining work is engine related. First off, I cleaned up the old valves with the trusty Black & Decker and wire brush attachment, then lapped them in. That went surprisingly well. Refitting the valves was a bit of a problem, but mainly because of the pretty basic spring compressor that I bought. Done now though, and a nice clean combustion chamber to show for it. Non-geeks may leave now!


Cylinder block was then refitted, with the help of no 1 son, who held the block while I squeezed the rings. The Haynes manual suggested doing it this way without a ring compressor would result in nightmares, but it went surprisingly well! (The nightmares were saved for a short while later.)


Then the cylinder head went on sweetly - it's starting to look like an engine again. The vapour blasted parts look great against the newly painted cases.


Here is where it all went horribly wrong and I took leave of my senses. I could skip over this bit and no-one would be any the wiser, but I hope by sharing this I might save someone else making the same idiotic mistake that I made.

You see, I came to install the very long bolts that hold the cylinder and head down and there are 4 that sit in the centre of the head under the "spine" of the frame. The photo below shows the problem I faced - that there was insufficient clearance to get the bolts in, as the frame was in the way. The photo also shows the blindingly obvious way that Honda designed this problem out, but I missed it! I was tired; it was late and I decided to sleep on it.


My solution involved having to virtually remove the engine again to get enough clearance - see below.


Clever Mr Honda's solution, which I didn't see until I was bemoaning my fate to my son, was to thoughtfully provide 4 nice holes in the frame to drop the bolts through! I must concede here that I think Honda's solution is better than mine!

It has taught me a really good lesson though - I think I am normally pretty good at stepping back and thinking about the bigger picture, but this time I was so blinkered to finding a much more obvious solution. Shame on me......


Anyway, all's well that ends well and before long the tappets were set and the head cover installed.


So now the gorgeous new exhausts could finally be properly fitted. This time I thought a bit harder about it and it all went much smoother!

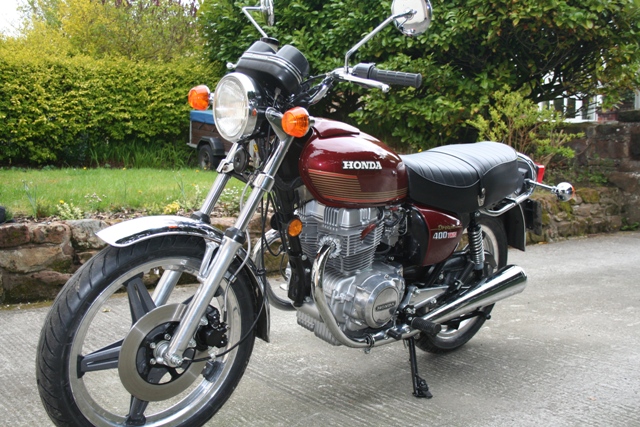
It was those short stumpy exhausts that first attracted me to the styling of this bike all those years ago when it was launched!


Finally, for today, the carburretors have been reinstalled. I'm not mad on the look of the jubilee clips holding the airbox connectors but the original hose clamps are shot. I think I'll bite the bullet and get some new Honda ones pretty soon (or next winter? :) )

You can see from this photo that I've also done a lot of the detail stuff as well - the engine side cases are on; kick start and gear lever refitted; head steady installed etc


Incidentally, the replacement left hand switch gear turned up and was in worse condition than mine, with a definite intermittent cable break somewhere in the loom - beware EBay descriptions by scrappers beginning "Good Condition"! It will be going back for a refund. 

On further investigation, my horn problem was not in the switchgear but is a faulty horn! I've ordered a new one from Wemoto. There's a pattern here of me overlooking the bleeding obvious!

Final bits to do this week before trying for a start are the clutch cable, fit out the tank and install a fuel filter and then all of the fluids etc. I'm really hoping it works, otherwise the Thundersprint Show is under threat.

Wednesday 18 April 2012

24 days to go...

...till Northwich Thundersprint Bike Show


This was the deadline I set myself to motivate me to finish the restoration after 2 years of drifting.

So, just over 3 weeks to finish the reassembly, snag and MOT then get a few shakedown miles under the wheels before the show. I'm really hoping that the engine will run well, with the carbs having been rebuilt with all new parts. Any problems and I might be knackered!

Last polishing finished :)

I've been struggling with our internet connection ovr the last few days, so this is the first chance I've had to post the work over the weekend.

I finally got the motivation to do the last bit of polishing - the 2 engine side cases. I detest polishing! It took me the best part of 5 hours on Sunday and the results are presentable but not world class by any means! Either I'm not very good at it or it's just a godforsaken horrible job.....

Anyway, before:


... and after:


A 500% improvement, but there were a lot of little bits I couldn't get into, if you look closely. Good enough for me though. I've painted in the black detailing since then as well and will update the photos when I get a chance.

This week's work will concentrate on rebuilding the top end of the engine, but work has intervened so far with early mornings and late nights. Hoping to get some done tonight though.

Friday 13 April 2012

Bl**ding brakes....

Progress has slowed down over the last couple of days as I've been catching up on life outside of the rebuild :)

There have been lots of little detail bits done though. The indicators are all installed now and looking good on their new or rechromed stems. I charged up the new battery and connected that up today. Indicators - check (but with an intermittent cutting out on the right); lighting - check (but with an intermittent cutting out on the headlight); horn - fail; lights on/off - check; starter solenoid - check; clock lighting and warning lights - check.

All the "fails" are routed through the left hand switchgear. I think that was the side that had been exposed to most of the weather while the bike was laid-up. I've opened it up and it's pretty corroded in there, so I think I'll bite the bullet and try to find a decent second hand one to replace it.


The front brake caliper and hose etc are all fitted up now - most of my pain this last couple of days has come from trying to bleed the bugger! First off, I tried the Haynes method (Tube from the nipple into a jar of fluid. Squeeze, release nipple, tighten, release lever. Repeat.) This has worked OK for me in the past but was a complete failure this time.

After a bit of internet research, I decided that "reverse bleeding" was definitely the way to go. (Apply pressure from the bottom end so you can drive the air out of the top.) While this looks fantastic in principle, I just couldn't get the fluid to flow back through the master cylinder. What I did do though was use this method to make sure that the brake line was full of fluid by pumping it upwards with a syringe, till it ran clear from the top end, then reconnecting to the master cylinder. Still, the bugger wouldn't generate any pressure.

I then decided to bleed down in sections. So I wrapped a cloth round the union between master cylinder and hose, pumped the brake, then gently cracked open the union to release any built up air there before quickly nipping it up again. I did that twice and BINGO the lever went firm. I'm assuming that there must have been an airlock at that point? Anyway, I just bled off a little remaining air from the caliper and it is now fine. Another half hour job that took half a day!


I couldn't resist adding some bling next, so the silencers are on, although they'll need to be taken off again to fit the collector box seals, which I'd forgotten to order. These are pattern silencers from David Silvers and I'm very pleased with the quality, but I had to trim about 5mm off the ends (where they go into the collector) to get them to fit. Minor issue though.


Heavily into blingy bits now, I realised that I still needed to move the catches etc across from the old seat onto my new pattern one. I thought I'd finished with the wire brush attachment and black spray paint, but out it came again! Seat's looking good, though the fittings for the grab strap are a bit cheap looking. I may refurbish the existing seat at some point.


Primary drive cover removed for paint stripping and polishing. I've also taken the chance to check the clutch spring free length (fine) and adjusted the balancer shaft.


Yesterday, I collected the upper engine parts from F&J Halliwells (01695 722004) http://www.scoot.co.uk/England/Lancashire/Skelmersdale/F-%26-J-Halliwell-EBO425.html . Mark has done a lovely job and I thoroughly recommend him. A true enthusiast as well - he has a beautifully restored RD350LC in his garage, which I lusted over!


I've given the head cover a coat of paint to match the crankases. Incidentally, CarPlan silver wheel paint is an excellent colour match. I'll report back on durability..... A quick reminder of what they looked like before:


And finally, I couldn't resist another quick "before and after" of the handlebar area:


We're getting perilously close to being ready to try for a start soon - I did a list of outstanding jobs in the workshop last night and reckon there are about 10 hours of work to do. :)

Saturday 7 April 2012

On a roll now


A great full day's work today has seen loads more progress this afternoon.

Firstly, I got the short engine back in. Being by myself, my cunning plan was to reverse the way I took the engine out by balancing the engine on the trolley jack and raising it into position; then pop in a couple of bolts and bingo - job done. The reality was that it got part way there before falling off the trolley jack via my finger and left a nice blood stain across the new silver paintwork...... ('twas but a scratch, it just bled a lot!)

Plan B was much more intelligent (and safe!) and involved rope to sling the engine off the top frame rail so that it was supported while I jacked it up. MUCH more controlled and calm this time. We have a lot to learn from the Egyptians :) In the photo below, you can see that the clutch cover is still in it's grimy state - one of the jobs this week is to do the last polishing of the two engine side covers. The front engine bolts are a bit of a mish mash. They look OK because they've been zinc plated, but I'll probably replace them with stainless in proper sizes sometime soon. I refitted the chassis plate using silicon sealant.


With the engine in place, I could finish the electrics and that meant refitting the controls and clocks. The brake master cylinder was overhauled with new seals etc and repainted ages ago using Plastisol and looks really nice now. The clock casing was polished up using a couple of coats of black trim polish and again has come up well. It's starting to look like a bike again now!


To the back end, and I installed the new front sprocket and the drive chain. I've never fitted an "O-ring" chain before and I was surprised to see the little rubber o-rings on the split link. This made it a bit harder to fit but all it needed was a bit of inventive use of a G cramp to compress them a bit while I got the spring clip on and it went OK.

The chainguard is also back on now and I've adjusted up all the back end and brake etc to get the right chain tension.

I also fitted the rider's footrests, but the pillion ones don't go on until the exhausts are fitted, as they also hold the silencer rear bracket.


Next up was to fit the headlamp shell and indicator stalks. I really wasn't looking forward to this next bit - sorting out the spaghetti in the headlamp shell, but actually it went fine (well, the proof will be in the pudding when it has some power to it!) I had terrible memories of plugging together dozens of bullet connectors from when I did the G5, but this was great with 4 block connectors dealing with most of it. I'd made lots of notes when I took it apart and that helped a lot too, as did a good photo from before I stripped it down. There might even be enough room to fit the headlamp as well.....


The airbox cover and air filter holder are now in place - I just need to get hold of some M5 bolts to hold the cover down.


And the last job of the night was to start installing the indicators. The "pattern" units I bought from David Silvers don't have a long enough cable, so I needed to extend them using the cable from the originals. 10 minutes with the soldering iron and a bit of heat shrink sleeving saw that done. I'd already fitted the stems onto the grab rail, with the earth cables and plastic cable casings, so then just needed to thread the power cables down the plastic sleeves. Time for Noel's next top tips:

Top Tip 1: the right hand indicator cables are longer than the left hand ones as they need to cross over the bike! Tomorrow morning, I'll be refitting the earth cables to the correct sides!

Top Tip 2: run a length of garden wire cable down the plastic sheathing and use that as a draw wire to pull the power cable through.

I'm not sure whether the pattern indicator lenses will pass the MOT as they aren't "E" marked. I'm assuming that they must be OK as David Silvers are such a reputable company, but I'm keeping the old lenses for the moment in case I need to bodge them on for the MOT.


And that's today's progress - to be honest I could have carried on all night, as it seems to be coming together faster than I anticipated.

One bit I'm a little disappointed with is that the indicator stalk mountings on the grab rail aren't quite in line. It looks as if the right hand one has been knocked out of line a bit (maybe after a drop?) but there's no obvious sign of any damage. It actually looks like it's been welded up that way at the factory. Looking at my original grab rail, that also looks out of line, so maybe the quality control at the factory was just a bit poor? It's not a huge problem, but I can imagine it will niggle when it's finished. The grab rail was a second hand E-Bay purchase and the chrome is passable but not 100%, so it might be that I'll have it re-welded at some point in the future and re-chrome the whole grab rail. Good enough for now though.


Easter Holidays = big progress!

Off work for 10 days at last, so I'm hoping to break the back of the rebuild while I'm off.

The upper engine parts have now been delivered for vapour blasting at F&J Motorcycles in Skelmersdale. The place looked great and has a really good reputation, so I'm looking forward to seeing the results at the end of the week.


I've spent a good solid day installing various bits and pieces. First the rear mudguard, grab rail and airbox got fully fitted:


The back wheel has been off a couple of times. I couldn't work out why there was so much free play on the rear sprocket. After a bit of pondering, it dawned on me that there must have been a spacer on the old rear drive sprocket that I hadn't spotted when dismantling. Sure enough, when I checked the "old bits" box, there it was, hidden under the grime - job done :) 
Noel's Top Tip - don't throw anything away till the rebuild is finished!

Next was the torque arm and brake pedal etc. That also needed a bit of rework as I'd put the main stand shaft in the wrong way round. But now the rear brake is fully functional.


That pedal spring looks a bit grimy compared to the nice new main stand one - I can see it being replaced asap :)

The battery box is fitted. Dreading doing the electrics though.....


I've also put some of the bits and pieces back on like seat catches and helmet lock etc. That gives me an opportunity for a good "before" and "after" photo:


So then I couln't put off the electrics any longer. Actually, it's not been too bad (so far), but only because I took a lot of photos and notes when I stripped it all down. I've given everthing a good squirt of contact cleaner as well, so hopefully that will help ensure it all works when the new battery goes in.


Short engine should be fitted this afternoon.