Wednesday 28 March 2012

Am I just being paranoid......

..... or do my wheels really hate me?

I'm sure they do. They must have really loved being rusty and anodised all those years but since I sanded it all off and polished them up to look shiny and new, they've done everything they could to drive me insane!

I finally got air into both of them last night - at the 3rd attempt each - hooray! What's even more impressive is that there was still air in them this morning......

I was desperate to get the front wheel on: a) to see what it looked like, and b) because the bike is VERY unstable on the centre stand while it's leaning down at the front on the fork ends. So as soon as the tyre was staying up last night, I tried to reassemble it onto the spindle.
Noel's Top Tip #17: don't get your spindles zinc plated. I never really thought about this but the zinc plating has added enough thickness to the spindle so that it won't go throught the holes in the bearings :(

Anyway, much careful work with a file later and it slid in like a good 'un, so the front wheel is at last in place, as is the front mudguard.


The airbox is also loosely in place, waiting for the rear mudguard to go on (now that it's more stable). Then some more careful filing on the rear spindle will no doubt be necessary as well.

It's almost starting to look like a motorbike again :) I'm hoping to drop the engine parts off for vapour basting on the way home from work on Friday, which will be another milestone reached.

45 days till the Thundersprint Bike Show!

Sunday 25 March 2012

Building up the Rolling Chassis

Today has gone well, with the new taper roller head bearings installed and the head set refitted, then the forks and front end in.


The main stand is also fitted; swinging arm and shockers installed and I've got the airbox loosely in, but then ran out of time (it was payback time - I had to mow the lawn!)


I was really looking forward to getting the new Avon Roadrunner tyres onto the rims, which I did do but also managed to pinch both tubes while I was doing it :(     I couldn't believe it - after all the hundreds of times I've changed a pushbike tyre without doing this!

 I was following the Haynes method, but I'm going to try again using my own way and see how that goes. The rims do look good with the tyres on though - even if they are a little devoid of air!


Saturday 24 March 2012

Today is officially the start of the rebuild :)

So the engine's all stripped and ready to go off for vapour blasting next time I'm passing.

The workshop is all cleared and ready to start work and the parts are ready and waiting. Time to get going!


  • Front forks rebuilt and refilled with oil - tick
    • Top Tip - heat the fork legs up by standing in boiled water for 10 minutes before putting the oil seals in - the metal will expand and make it easier to fit the seals.
    • Top Tip - I used an old plastic measuring jug to refill the legs with fork oil and marked a line on it with permanent marker so that both legs would have as near as possible the same amount of oil in them.
  • F & R wheel bearings and oil seals fitted - tick
    • Top Tip - conversely, stick the bearings in the freezer for a couple of days first to shrink them down and make them easier to fit.
    • Top Tip - label the bearings beforehand so you know which ones go where!
    • Top Tip - the old bearings are useful to use as drifts to drive the oil seals in.
  • Speedo drive fitted - tick
  • Sprocket and cush drive fitted - tick
  • New brake shoes and rear brake fitted - tick
Tomorrow should see the tyres fitted and wheels finished.

This is feeling good :)

Wednesday 21 March 2012

Like Father, like son

I always used to laugh at stories my Mum used to tell me about Dad stripping down bikes for the winter in the '50s and storing all the bits under the bed and on top of the wardrobe.

Where has my newly painted petrol tank ended up for safe keeping?


On top of the wardrobe in our bedroom of course! :)

"Before" photos of engine

Just thought I'd grab some photos of the engine stripped down, before the top end gets sent away for vapour blasting.


Engine casings resprayed:


Side casing taken off ready for polishing:

Tuesday 20 March 2012

Now we're motoring....

Wayhey - top end of the engine is now stripped down :) I'm guessing it's the first time since it was built at the Honda factory in 1977 too, judging by the reluctance it showed to come apart!

Lots of patient hammering using a wood block didn't appear to be making much headway after half an hour or so, so I followed the Haynes manual guidance that I might have to resort to VERY gentle levering with a tyre lever and off it popped! The barrel was just as hard to get off but eventually it knew it was beaten and gave in :)

What great condition it's in - I'd hoped it would show little wear, with having done only 10k miles, and it didn't disappoint me. The pistons and bores have no visible wear, camshaft and bearings look in great nick etc. You can still see the honing marks on the barrels and there is no "lip" at TDC at all. The piston crowns and valves look a bit coked up, as if it's been running rich, but that ties in with my reckoning that it was first taken off the road because of a carburation/choke issue.

I'm just waiting for my new valve spring compresor to arrive now, then I can strip the head down and send the head, barrels and cam cover off for vapour blasting, hopefully later this week.

I'll post some "before" photos of the engine asap.

NOTHING stopping the start of the rebuild then. The wheel and head bearings have been dispatched to the freezer for a couple of days, which I'm told will make them easier to fit - we'll see :)

Happy as a pig in sh1t tonight! 

As an aside, the last engine I stripped down this far was on one of the G5s - 1978ish. My abiding memory from that is that it had badly scored cam bearings etc and I shoved it all back together again quick, hoping it would be OK! It ran for a while longer like that, but they weren't exactly known for their longevity in the hands of ham fisted monkeys like me! It's nice to be doing things properly this time!

Monday 19 March 2012

Wheels done!

I finished the detail polishing of the wheels last night, as best I could.

The little felt polishing pads I'd bought for the Dremel weren't really up to the job to be honest and I was in danger of doing more harm than good from the little devil spinning at 10,000rpm! So, discretion being the better part of valour etc, I gave up and polished it as best I could using good old Solvol Autosol and elbow grease.

It all looks pretty presentable now - with the plastic covers back on, a man on a galloping horse won't be able to see the little bits I couldn't get into. The photo doesn't do it justice with smudgy handprints all over!


I know I said that was the last thing before the rebuild starts, but ............. actually I have to strip the top end of the engine down to send the barrels, head and head cover off for vapour blasting. (I'm waiting for the valve spring compressor I've bought to turn up so I can finish stripping the head.) You can see the mucky and corroded upper engine on nicely painted cases behind the wheel in the photo above. The side cases will be polished when I get a spare couple of hours.

All that engine stuff won't stop me rebuilding the rolling chassis though, so I'm now clearing space to get started. :) :)

54 days till the Thundersprint bike show - time to get a move on.

Sunday 18 March 2012

Beautiful Paintwork!

I finally picked the tank and side panels up from the painters yesterday and I have to say that he has done a beautiful job. The pain of having to throw a bit more money at it has now gone and actually I'm feeling a lot more charitable towards Roger about it all. In my mind the root of the problem was that inadequate warning was given on the decals instructions - no point in raking over all that again though - look back a couple of entries to understand the issues! Roger, you are forgiven :)

A reminder of what the tank and side panels looked like "before":


... and here's what they look like now:


The tank badges and chrome trims still need to go back on, but I think they look gorgeous and I'm really, really pleased with the colour.

I've now got all of the hundred and one bits and pieces cleaned up as well, so just the detail polishing of the wheels to do now and then I'll be ready to start the rebuild!! Can't wait!

But first I must do Mother's Day duties :) ......

Monday 12 March 2012

Paint & Decals update

I just had a call from the painter to let me know that the decals have gone on fine second time around and have been laquered - everything looking great he says. I'm picking it all up on Wednesday afternoon, which will be nice.

There's a big BUT though..... Having been delighted with the way he dealt with the problem, now that it's been solved and my goodies are all done, our previous conversation about sharing the cost by me buying new decals and him re-applying and clearcoating  free of charge has been conveniently forgotten and I "must have misunderstood". That certainly isn't the case - we had a real clear understanding of the way forward, I made sure of that.

I feel like I'm being held to ransom and have no alternative but to pay up now :(

What would I do differently next time? Probably go to one of the big boys to be honest - I suspect that it wouldn't have cost me any more. For what this has cost me, I could have bought a spray kit and done it myself without all the aggro.

Feeling very let down and exploited at the moment. Fortunately this has been the only bitter supplier experience I've had on the whole build. I guess I've not done too badly really?

Will post up some photos as soon as I have the tank in my grubby mitts.

Sunday 11 March 2012

Ultrasonics

Another couple of hours this afternoon has seen most of the rest of the greasy rubbish cleaned up. One more session should finish it off :)

I tried out my ultrasonic cleaner that I bought from Aldi a couple of months back for the first time today. What a fine piece of kit!


I needed to clean up the 20 or so plastic covers that snap over the junction of the rim and spokes on the Comstar wheels. Each has "Honda" embossed on it and I didn't fancy trying to clean out 30 years of accumulated junk from each one with a toothbrush! The ultrasonic cleaner was great though. I gave them all 5 minutes in warm water with a couple of drops of Fairy liquid in and the water was black at the end! Change water and repeat and they are all nice and clean now. A quick coat of "Back to Black" and they look great :)


The ultrasonic cleaner was only about £15 I think - highly recommended piece of kit next time they come around in ALDI.

Thursday 8 March 2012

Who left all this greasy rubbish here?

Spent a couple of hours this evening cleaning up last bits and pieces, so I can be ready to start THE BIG BUILD in a couple of weeks.
So things like breather tubes, wiring loom, handlebar controls etc all got a good deep clean. Job done.
Then I found another box full! Oh well, what's one more night after all this time :)
I'm really having to resist the temptation to have everything looking brand spanking new at the moment. I decided at the outset that my 'standard' to aim for was that it should look like a well cared for 2 year old bike, so it's ok to have the odd tarnished bolt etc. But the temptation is almost irresistible at times...
I think I will end up gradually replacing the patina over time!
Anyway, one more night should see everything cleaned up.
The 'to do' list has reduced a lot this week. Now it is only: finish cleaning bits; detail polishing of wheels; strip top end of engine and send head and barrels off for vapour blasting; repaint cam cover; polish engine side cases. Then I can start reassembly. Can't wait!

Wednesday 7 March 2012

Second time lucky?

Well, the new decals arrived from Sunrise Graphics today and have been safely delivered to Roger the fab painter.

Plan B is for him to just do a single decal on one of the side panels and see how that dries (hopefully without lots of horrible air bubbles this time), before committing to doing the rest.

Please let it be right this time........

I was planning to get out one evening this week and cleaning up the remaining parts, but life's intervened this week. Hopefully out there tomorrow.

Sunday 4 March 2012

Paintwork

Hey, I'm nearly up to date!

The tank and side panels are currently away being refinished and that has been a bit of a saga.

I'd decided long ago that the colour would be changed from blue to the deep metallic burgundy that my old 400-4 had been. The Dream was available in this colour, or something very similar, but it's not that common. The Honda colour is Candy Antares Red - it can be obtained from RS Paints, but is expensive and I wasn't obsessed with getting a perfect match. The colour I've chosen is actually a Malagutti colour.

Thanks to my mate Paul by the way for recommending Roger Smith in Hoylake 07771 895 674 for the painting. He has been really good - not the cheapest, but real personal service and a lovely guy to deal with.

Here's how they looked before they went to Roger, not terrible but showing every sign of their 34 years:


The tank underside was quite corroded and Roger suggested having it sandblasted back to bare metal. The painting has now been completed and clearcoated and looks gorgeous. Are you waiting for the "but"?

But, when Roger came to apply the decals I'd got from Sunrise Graphics, the problems started. He'd left the paint and clear coat to go off for 2 days, as instructed; applied the decals and squeegeed a few air bubbles out as he did it - all normal till now and the job's looking good to finish in the morning. Anyway, he came back the next morning to find hundreds of little "micro-bubbles" under the decals. Obviously, they couldn't be left like that, so Roger called me down to have a look.

After calls to John at Sunrise, the conclusion was that, though the paint was hard at the surface (hard enough for Roger to polish in fact), it hadn't quite given up all of it's solvent and the bubbles are trapped solvent vapours that came out of the paint overnight. It had been cold that week - maybe that contributed? Anyway, Noel's Top Tip is to wait at least 7 days after painting to apply the decals, not 2 days as stated in the instructions.

Roger removed the decals without any damage to the paint with a bit of heat from a hairdryer and we are currently waiting for a new set to arrive, probably this week. Once on, they can be clear coated and job done. The paint will have had a couple of weeks to harden by then, so they'd better be right this time!

I'll post some photos as soon as it's all back.

It has always been my view that you should judge companies on how they react to problems, not how they sell you goods. Roger has come out of this as a shining example - he's been open and honest at every stage and can't do enough to help sort it out, even though we're both pissed off that the decal instructions were followed to the letter. The decal suppliers on the other hand have been patronising and defensive throughout, even dismissing my suggestion that they should change their instructions to allow a few more days for the paint to go off. I know who I'd rather deal with in future and where my recommendations will go.

I heartily recommend Roger Smith of Hoylake 07771 895 674   ;-)

While the tank's been away, I've cleaned up the Honda badges and they are ready to go back on as soon as it's home.

Bits n' Pieces

Various bits that have been restored over the past 12 months or so.

Before and after - polished fork leg:


Headlamp shell painted (recommend Plastisol Gloss Black)


A shelf full of new goodies!


Brake caliper refinished - the old pad pins (gold bits) were completely corroded in and I had to drill them out. New stainless piston kit and seal going in it.


Some parts back from the chromers. The spindles on the left are zinc plated. New indicators from David Silvers (the lenses aren't CE marked so I'm hoping they'll be OK at MOT. I'm keeping the old ones just in case).


More shiny bits! and the second hand grab rail I found locally. They seem to be rare as rocking horse whatsit. It has polished up nicely - not perfect but good enough.


I needed to do some re-assembly!  Rechromed rear mudguard. Undersides have now been painted in a couple of coats of Hammerite to try and prevent more corrosion in future.


Powder coated goodies.


One fork leg reassembled. Fork sliders were NOS - much cheaper than hard chroming the old ones and a lucky find - I've not seen any more come up since.


Pillion footrest rubbers cleaned up and reassembled onto zinc plated pegs and cotter pins and powder coated brackets.


And also the rider's footrests.


Electrics backplate. It was originally gold passivated I think, but had gone quite rusty. I resprayed it using gold paint.


I bought a used set of Hagon shockers that cleaned up really nicely and I repainted the black parts. Bolts zinc plated.

The wheels! Quick, pass the valium.....


More polishing - brake back plate, fork leg and footrest plates.


Counselling....?

The true purpose of this blog can finally be revealed, as we begin the story of the wheels. I have a deep seated need to get it all off my chest and return to a normal life, now that they are almost completed.

In an earlier post, I talked about one of the reasons for restoring this bike was that it had alloy "Comstar" type wheels rather than chrome spoked wheels. "These will be a doddle to tart up" I thought "and so cheap". Little did I know....

The plan was to rub them down and spray them with silver wheel paint - £10 for aerosols and a sunny Sunday afternoon in the garden. But then I noticed how badly corroded they were on the inside of the metal spokes. Hmm, difficult to get in there and it will look rubbish if I leave it.

Around this time, the powder coating was due to be collected, and I had a natter with John at Elite about it. They could blast the wheels and powder coat the inner bits, but I wanted the "alloy" rim bits leaving, as they should polish up nice and easily. Ah, now that will be costing somewhat more, as they have to be masked for blasting, cleaned up, masked again for powder coating again etc. I decided to have a think about it.


A few weeks later, I'd decided I was going to change the colour of the paintwork from the pretty yucky (to my eyes) blue to a deep metallic burgundy (same colour as the 400-4 F2, for those that know it.) I suddenly had MY VISION. "Wow, what would look really great against that metallic burgundy is a metallic pewter silver wheel with bright polished rims." And I was right - it will look great, but boy it's been a hard road getting there!

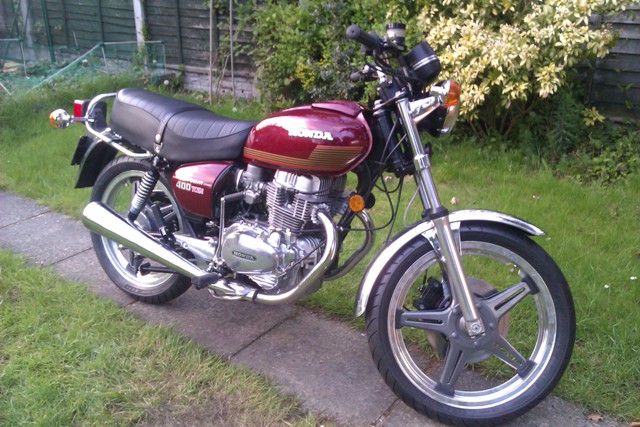
Here's the state the wheels were in at the start:


This doesn't really show how rusty the "spokes" were. I decided to bite the bullet and get Elite to powder coat in a metallic deep silver coating. This was quite a lot more expensive than normal and he also wanted to wait and do it as a batch with something else he had coming through - fair do's, but it ended up taking several weeks longer (not really an issue on my timescale!) It was also really expensive because of all the protective masking of the alloy rims.

Anyway, I got them home and set to for a quick job polishing up the alloy rims with a bit of chrome polish. What I hadn't realised was that, though the rims are alloy, they have an anodised coating.... What a bugger that stuff was to get off! It was tough as old boots and I had to sand it from every nook and cranny. It took probably a full day on each wheel just to get to a surface ready for polishing. And I had to buy a "mouse" palm sander with a pointy nose to get into the corners that I probably will never use again  :(

Of course, I had to protect the beautiful pewter powder coating that I'd paid a bomb for, which made it even harder. In hindsight, I could have just asked John to blast the lot off and wouldn't have had to pay for all that pre-masking! To protect the spokes, I'd wrapped them in cling film, then newspaper and duct tape - nothing was going to scratch them! But when I "unwrapped" them, the cling film had stuck to the powder coating! I spent 2 evenings getting it off with my thumbnail and thankfully it was OK.


With that out of the way, the polishing would be easy! I bought a kit from Halfords - good effort but not man enough for the job. Bigger mops and abrasives were ordered from specialists. This is more like it...... but I can't get into the nooks and crannies.

Smaller mops and abrasives for the trusty Dremel were ordered from the same specialists. Now we'll be getting somewhere. And that's where we're at currently, with just the detail polishing to be done. But they do look fab - well to my eye at least - and will make the bike I think.


Thanks for listening. I feel much better getting that off my chest.

The Grand Plan

Having stripped everything down into a hundred boxes and bags, it was time to think what needed doing; what I could do and what needed to be sent off. In no particular order, this was the plan - some of it now with the benefit of 20/20 hindsight.

  • Powder coating - the frame, swinging arm, main stand, side stand, footrest brackets, engine mounts and loads of other bits and pieces were sent off to Elite Engineering in Aintree to be blasted and powder coated in gloss black.

    I spent ages putting old bolts in all the threaded holes etc but this was a waste of time as John took them all out again and used his own tapered plugs! I was really pleased with the service, but make sure you allow a couple of extra weeks! Speak to John Heckle
    0151 524 2838
  • No Honda rebuild can survive without copious amounts of money being spent at David Silvers of course! http://www.davidsilverspares.co.uk/

    Great service and very helpful. I got loads of stuff: full exhaust system, new seat, indicators, bearings, brake pads etc etc - the list was endless and the boxes big..........
  • Paintwork: I changed tack several times. I'm no stranger to using aerosol cans and was going to DIY here. But as more money got piled in, I just thought I wouldn't be able to do it justice. Finally I took the plunge and got a local guy to blast and repaint the tank and side panels. I also got him to apply the nice reproduction decals that I obtained from Sunrise Graphics in Lytham. http://www.sunrisegraphics.co.uk/sunrise/

    Would I recommend them? Well the decals are great, but I don't rate his customer interface highly if I'm honest - maybe it's me, but he seems to do nothing but moan whenever you talk to him.
  • The wheels. The plan changed lots here. I was originally just going to rub them down myself and repaint them in silver. But the inside of the "spokes" was very corroded, so I decided they needed blasting and might as well then have them powder coated. Then I had THE VISION that ended up costing me so much time and money......... See the section later on wheels.
  • Chromework: most of the chrome was in a pretty horrible way, but was straight. The grab rail had been damaged by fitting a rack which rubbed against it, so I knew I needed a replacement. Over a number of months, I managed to pick up a number of new old stock (NOS) or good secondhand chrome parts off EBay and from the wonderful Stafford auto-jumble. Anything that I couldn't get was sent off to Niphos in Crewe for rechroming. http://www.niphos.co.uk/

    Lesson learned here is to be clear about what you want from them. I told them that I wanted the chrome to be good for everyday use, not show standard. And that is exactly what I got - can't fault them. But I probably would have been happier in hindsight to pay a bit extra for them to have put more time into the prep to end up with a better finish.
  • Zinc plating: I decided not to go down the "stainless everything" route, but wanted to re-use as much of the original bike as I could, so sent most of the nuts, bolts and brackets off to Niphos again for zinc plating, after I'd degreased and cleaned it all up with a wire brush. This is relatively cheap and looks fantastic! I subsequently also sent the wheel and swing arm spindles there as well and decided to get the tool kit replated, which is a great finishing touch.
  • Engine: I'd decided to take a risk that the internals will be OK, having done only 10,000 miles. The casings were shockingly dirty and corroded and I spent loads of time cleaning and preparing these for re-painting, which I did myself. Following an internet tip, I used silver alloy wheel paint. It looks great but we'll see how it stands up when used in anger.

    The side cases will be polished by me. The barrels, head and cam cover will be vapour blasted and the cam cover will be sprayed like the cases.
  • Carburettors: I sent these off to CCs http://www.carbcleaning.com/ with a Keyster overhaul kit for them to fit. What a fantastic service - they vapour blasted the outsides, stripped them down, ultrasonically cleaned them and re-assembled using the new jets, gaskets etc from the kits. The choke spindle bush was still a little tight when they came back but after lots of 3 in 1 it is fine.
  • Sundry brackets etc; I've spent ages cleaning, rubbing down and repainting brackets, master cylinder, brake caliper etc etc. But I like this bit - lots of job satisfaction at getting something looking nearly new again. Just the deep cleaning and polishing can make a huge difference.
  • Alloy polishing: I bought a polishing kit from Halfords - not up to the job for motorbike stuff at all - you need heavier duty mops and abrasives from somewhere like Polishing Supplies on EBay. I did the fork legs, footrest mounts, brake back plate and will soon be doing the engine side cases. But the hardest thing I did was the wheel rims - see later story. Polishing is a horrible, horrible job but with a very, very satisfying end result.
  • And finally for all those cables, chain and sprockets etc I used good old Wemoto.  http://www.wemoto.com/


Getting down and dirty at last

Boxes? Check

Freezer bags? Check

Digital camera? Check

Notebook? Check

Sockets set and spanners? Check

Hammer? Check

Bigger hammer? Check

Then let the strip commence!

This bit is very boring to talk about. The only recommendations I'll make to anyone considering doing this is to take loads of photos and sketches, particularly of things like wiring routes and springs. Then take more photos and then some more just for good measure. You WILL forget where it all went in a month or so. And don't throw anything away - keep it till the end when you KNOW you won't need to re-use the original.

I was a bit anal and kept a list of every bolt that I removed - with size, length, description etc. But that was because I knew I wanted to send it all off for zinc plating (highly recommended by the way) and I'd then be able to identify what everything was when I got a big bag of shiny stuff back.

I'll just throw a few photos in and let them do the talking here.


What's the plan then?

It almost seemed mad, washing such a rusty old thing with a bucket of soapy water. I can't say that it made much difference really, but I did manage to get rid of some of the oily greasy mess. Time to bring out the powerwasher!


I'm sure it DID look better - everything is relative I guess! 

It had been 10 years or so since I'd last stripped a bike down - my previous rebuild had been a 250G5, that eventually got sold on as an unfinished project, when I just couldn't stomach the amount of money I was putting into it, compared to it's value.

I'd already got my head round this one though, accepting that she would always be worth less than she cost, but that I couldn't put a price on the pleasure and satisfaction I'd get from the restoration and, hopefully, from riding and displaying her at the end. OK you're right, I had been assessing in my mind how much it was going to cost and hearing those "ker-ching" noises again and was already trying to justify the expense!

It's worth a quick diversion here - what was I trying to achieve? What was the goal?

I knew that I didn't want it to be a concours restoration. I really couldn't justify the expense and ultimately, I wanted to be able to ride it to and from shows, and hope others would get some pleasure from seeing a relatively rare bike in nice condition, but with no expectation that I'd win anything. I figured that, apart from the expense, if it was concours, then I'd never want to ride it. My vision was for it to end up looking like a really well cared for, 2 or 3 year old bike.

Part of the logic in choosing this bike over say a 400-4 was that it only had 2 cylinders against 4, if the engine needed rebuilding - I figured that would be cheaper, probably correctly, considering how much the carb restoration cost me later on. Also, I still remembered how expensive it had been to rebuild the spoked wheels on my G5. Because the Dream had alloy "Comstar" wheels, I figured they would be much cheaper and easier in that department to restore. Oh how wrong I was in hindsight - more of that later though.

So, what had I bought, a gem or a pup?

I collected the bike from Stockport - had to hire a van as I couldn't find anyone to borrow a trailer from. £60 into the restoration pot straight away and I heard for the first time a sound that was to become very familiar to me over the next couple of years - "ker - ching!"

What a nice guy I bought it from. In the inevitable box of bits was a Haynes manual, the original owner's handbook, the original and almost complete toolset and an original advertising brochure for the Dream. Also in there were the carbs and air filter etc that had been stripped off to try and get the bike going.

Here's the photo on EBay, which was how I first saw her. Didn't look too bad really.......


I got her home and in the cold light of the next day could really see what I had. Well, the rust had really set in - she had clearly been sat outside, but I think covered up partially. The mudguards had rather more than surface rust and the exhausts fell apart when I knocked them!


But on the positive side, everything looked to be there, original and unmolested. The tank and side panels were undamaged, but would need a repaint. The seat base was sound. She still sat on her original tyres - everything I could see supported the low 10,000 miles showing on the clocks.

This was great, but I really wanted to try and start her. The carbs clearly had issues related to the choke - the shaft that the butterflies sit on was completely seized into one of the carb bodies and the choke cable had snapped. Could it be something that simple that had caused her to be laid up?

I sat the carbs in really hot water for half an hour, got some mole gips on the shaft and, little by little, it started to come free. Lots of WD40 and 3 in 1 later, it was moving but not ideal - good enough to try and start it though.

There was still some petrol in the tank - from 2 years ago or 20 years ago?? Let's give it a bash and see what happens. I taped the exhausts together with duct tape (!), stuck some jump leads on from the car, and after 5 or 6 kicks she sparked up - first on one cylinder, then both. She sounded very rough - a combination of old fuel, gummed up carbs and holed/missing exhausts I hoped, but at least she would fire up and run. 


I took the first decision - go ahead without an engine rebuild, assuming that fresh fuel, a carb rebuild and new exhaust system will clear her lungs - hope so. 

Let battle commence!